Self-host multilingual Ghost blog with subdirectory routing
To support two languages, you’ll need to install 2 Ghost sites on the same server, setting up separate instances for each language.
- Default English -
https://domain.com - Korean Site -
https://domain.com/kor/orhttps://domain.com/fr/
Option 1: Hosting Ghost Multilingual on Railway (recommended)
This guide provides a detailed, step-by-step walkthrough for deploying a full multilingual Ghost setup on Railway using this reverse proxy template.
Prerequisites
- A Railway account.
- A custom domain you own (e.g.,
your-domain.com). - At least two Ghost instances deployed on Railway (one for each language).
1. Deploy Ghost Nginx proxy template
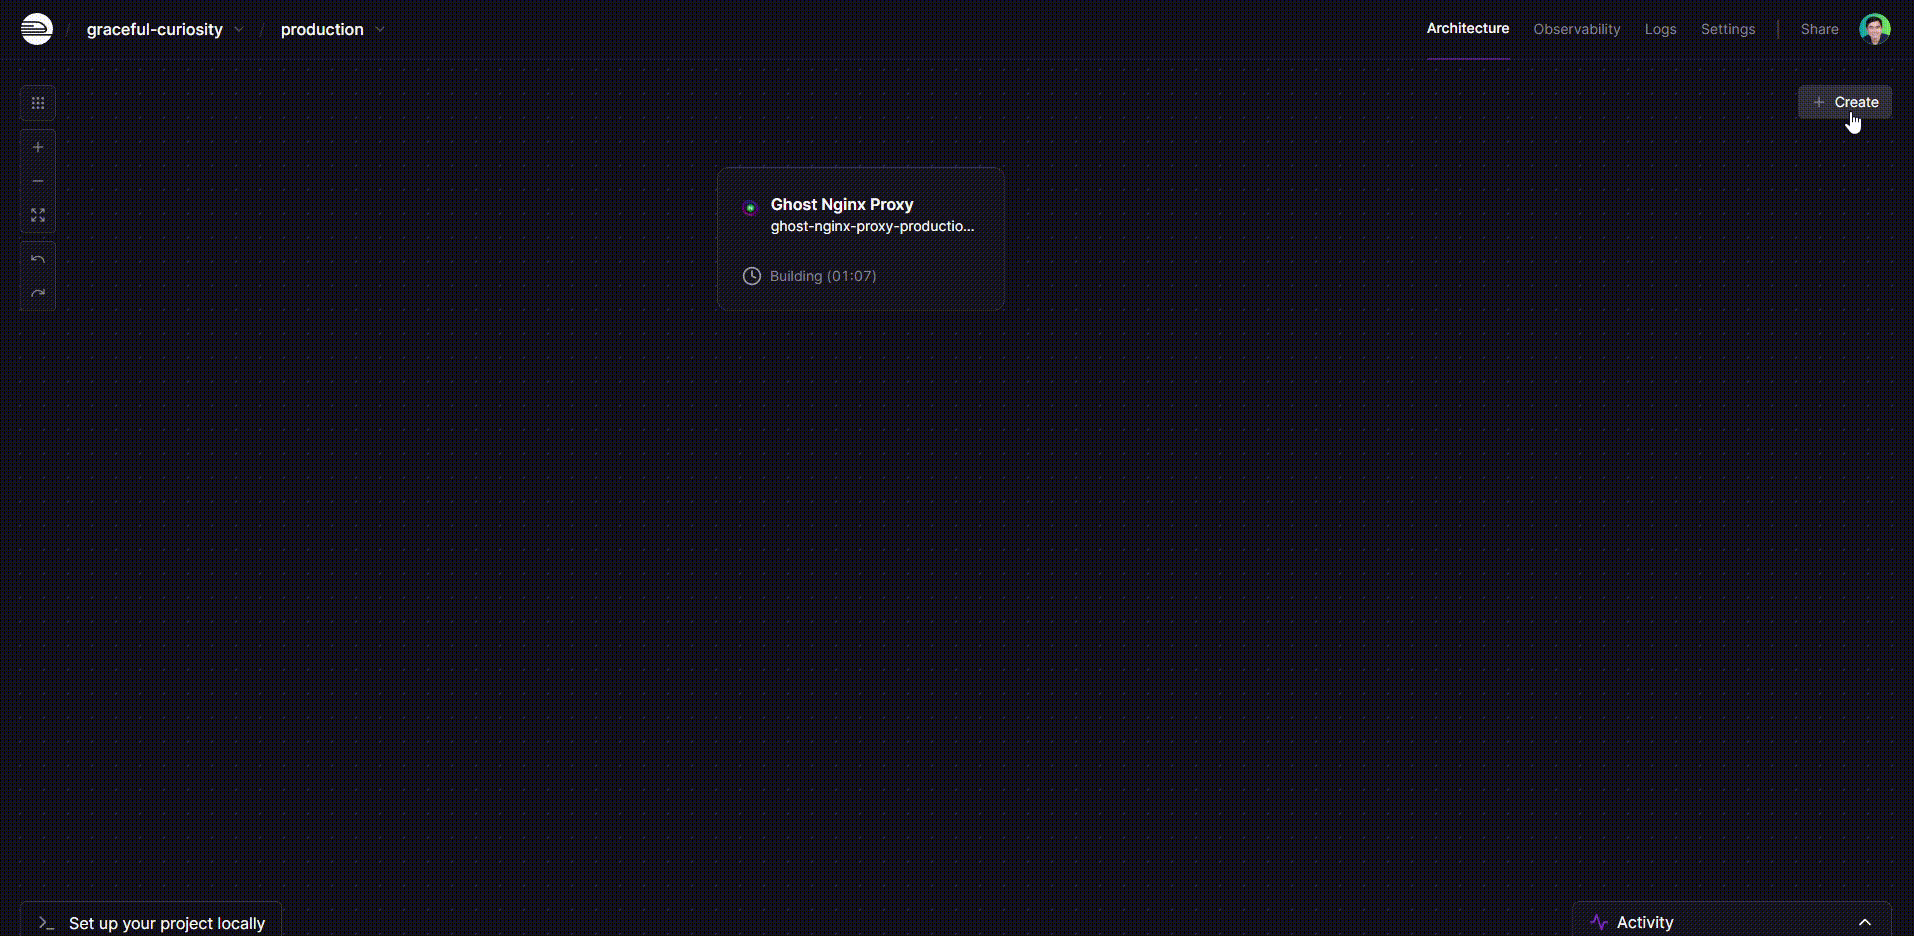
Click Railway wizard button below to auto deploy our deploy template on Railway.

Add first Ghost instance for your primary blog.
Add new > Search “
Ghost” > Add Ghost templateAdd secondary Ghost instance for your other blog.
Add new > Search “
Ghost” > Add Ghost template
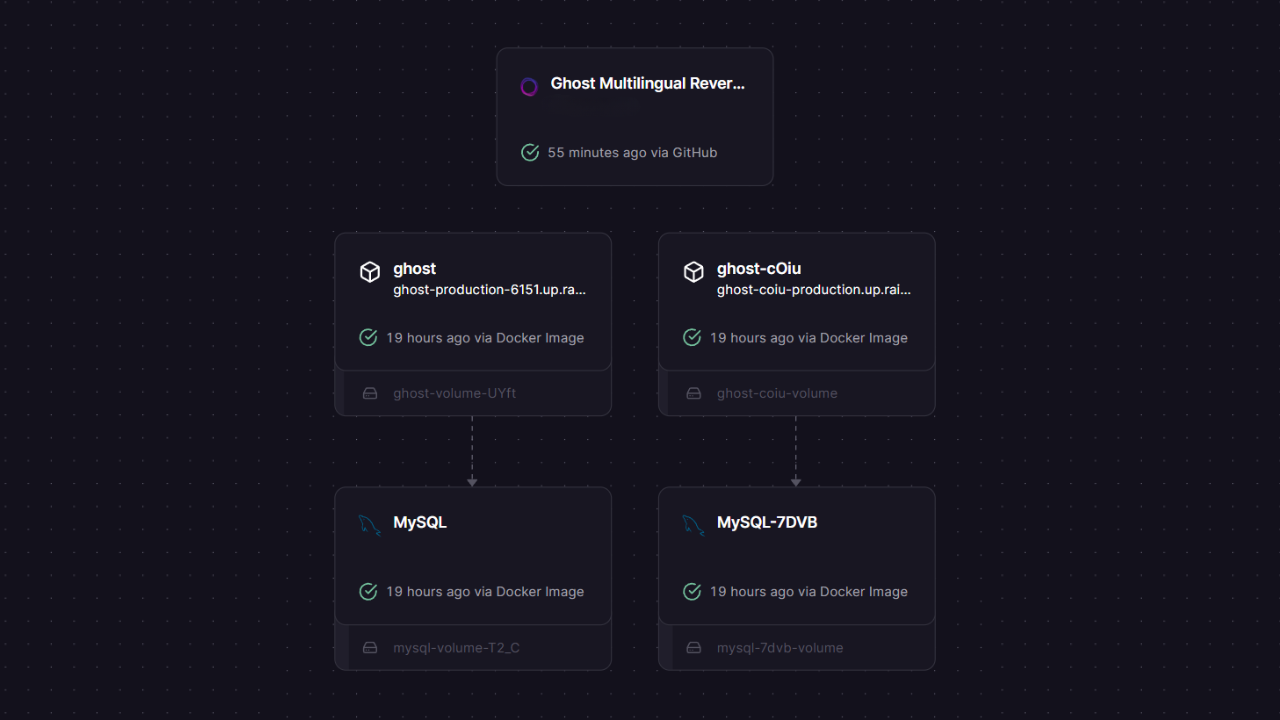
At the end of this step, you should have 2 separate Ghost services + 1 Ghost Multilingual Nginx proxy running in your Railway project.
2. Configure Environment Variables
This is the most critical part of the setup. You need to configure the variables for all three services so they can communicate with each other.
Find Your Internal URLs.
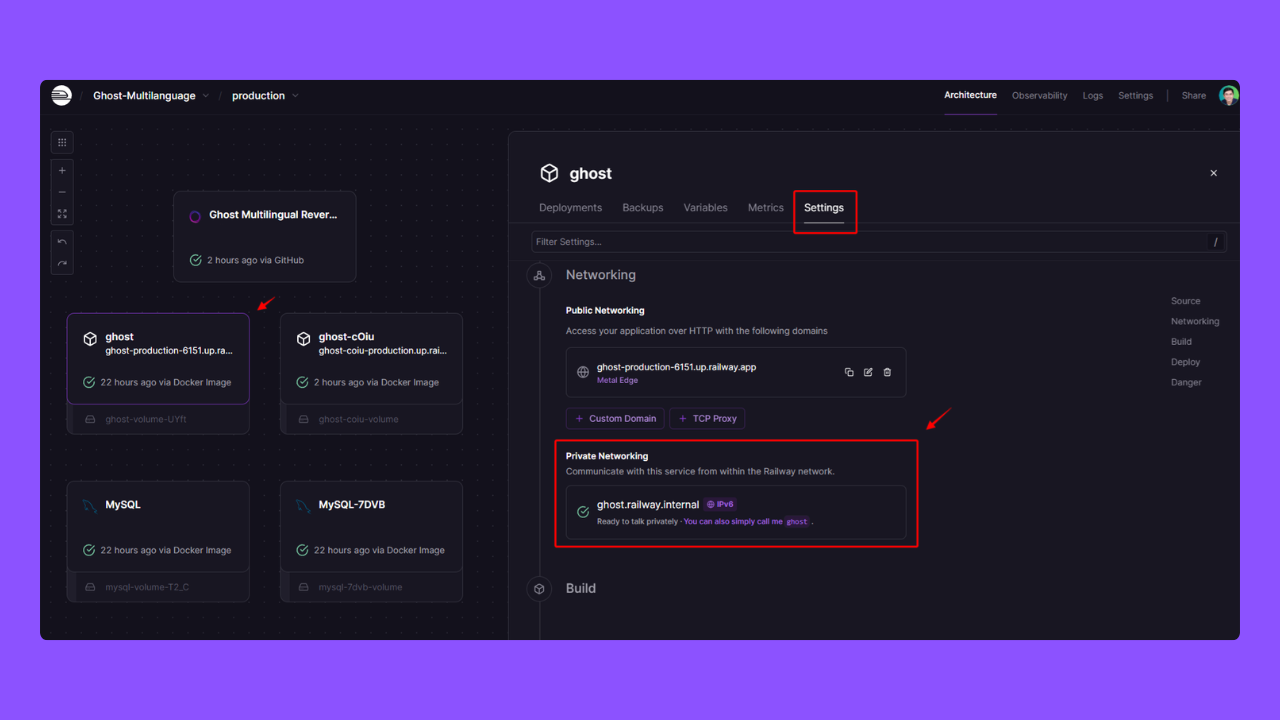
Internal URL is in Private Networking First, you need the internal URLs for your
ghostandghost-frservices. In Railway, go to the Settings tab of each Ghost service.Under the Networking section, you will find a private URL ending in
.railway.internal.It will look something like
http://ghost.railway.internal:2368.Configure the Ghost Multilingual Nginx Proxy Service.
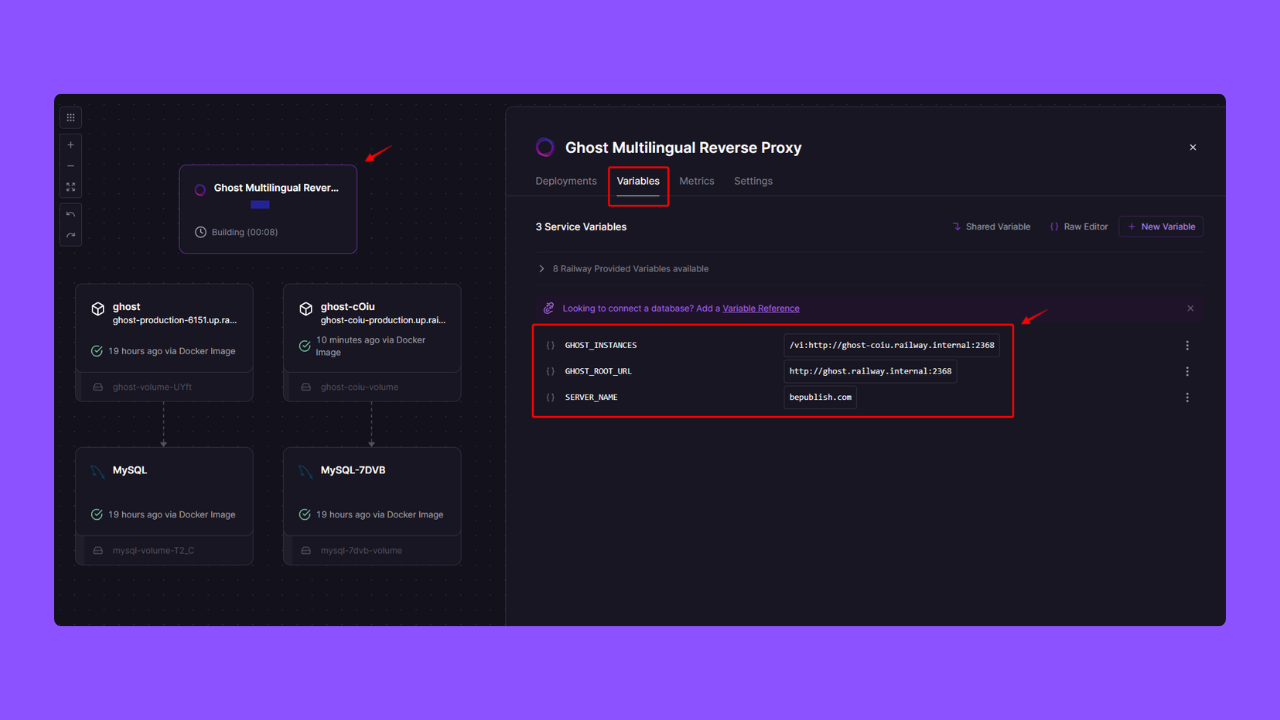
Fill out the requirements fields SERVER_NAME: Your custom domain (e.g., your-domain.com).GHOST_ROOT_URL: The internal URL of your main Ghost instance on Railway (e.g.,http://ghost.railway.internal:2368).GHOST_INSTANCES: The path and internal URL for your other Ghost instances (e.g.,/fr:http://ghost-fr.railway.internal:2368).Configure the Ghost Instances
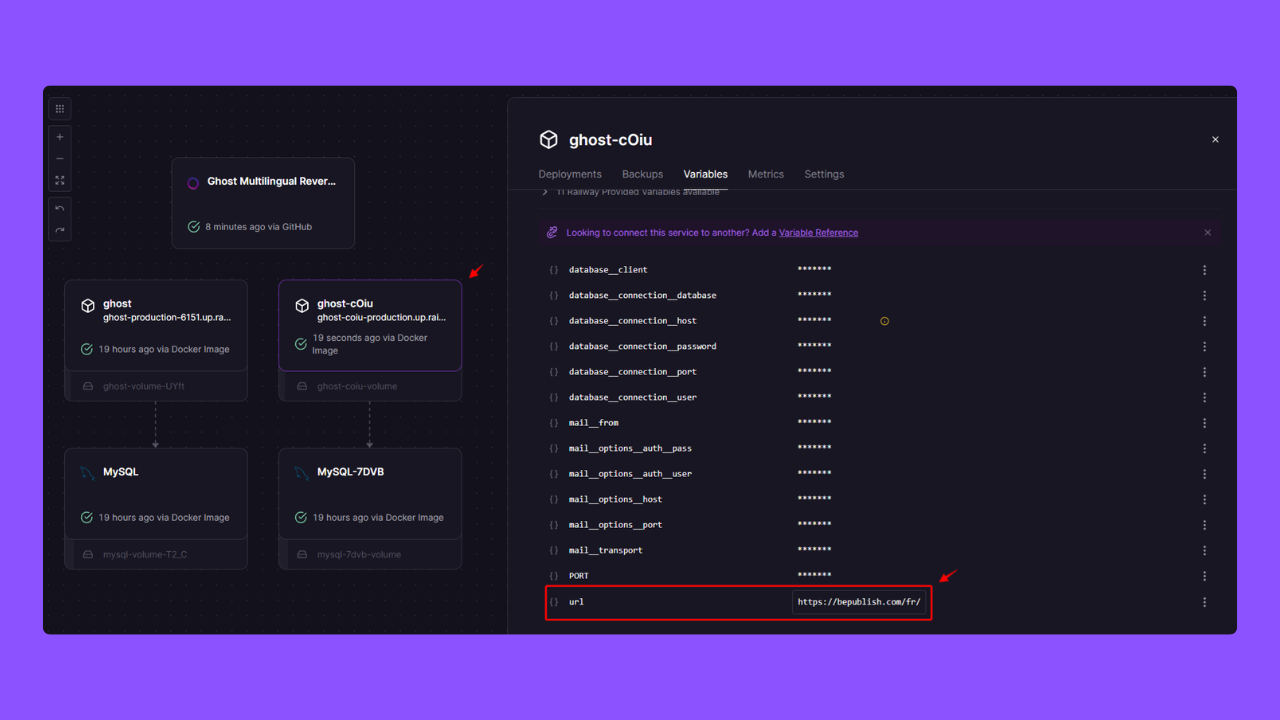
Set new urlfor each Ghost instanceGo to the settings for your main Ghost instance on Railway.
In the Variables tab, set the url variable to your full public domain.
Example:
https://your-domain.comGo to the settings for your additional Ghost instance (e.g., the French version).
In the Variables tab, set the url variable to your full public domain including the subdirectory path.
Example:
https://your-domain.com/fr/
3. Add Custom Domain
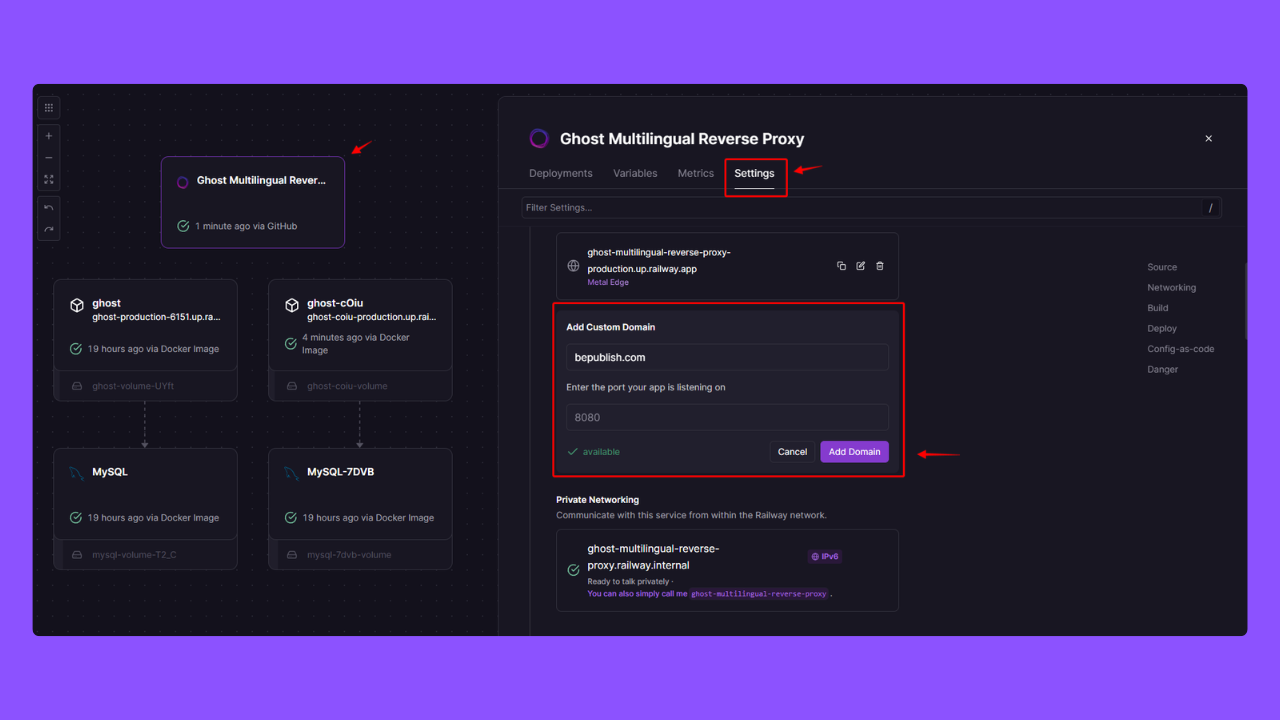
Finally, you need to point your custom domain to the reverse proxy.
- In the
ghost-multilingual-reverse-proxyservice settings on Railway, go to the Settings tab. - Under the “Networking” section, click + Add Domain and enter your custom domain (e.g.,
your-domain.com). - Follow Railway’s instructions to configure the CNAME record with your DNS provider.
- Ensure the domain points to the service port
8080.
After completing these steps and allowing some time for DNS propagation, your multilingual Ghost site should be live.
Navigating to https://your-domain.com will show the English blog, and https://your-domain.com/fr/ will show the French blog.
Option 2: Hosting Ghost Multilingual on DigitalOcean
Ready to go multilingual? This guide walks you through every single step to deploy a complete Ghost setup on DigitalOcean. Prerequisites
- DigitalOcean account (if have not one, register new DigitalOcean account here)
- Termius Software on your Desktop (Free download it here)
1. Generate SSH Key for Server Access
If you don’t already have an SSH key, follow these simple steps:
- Open Termius (which you downloaded earlier).
- Navigate to Settings > Keychain > Generate Key.
- Name your key label and select RSA as the key type.
- Click on Generate and Save.
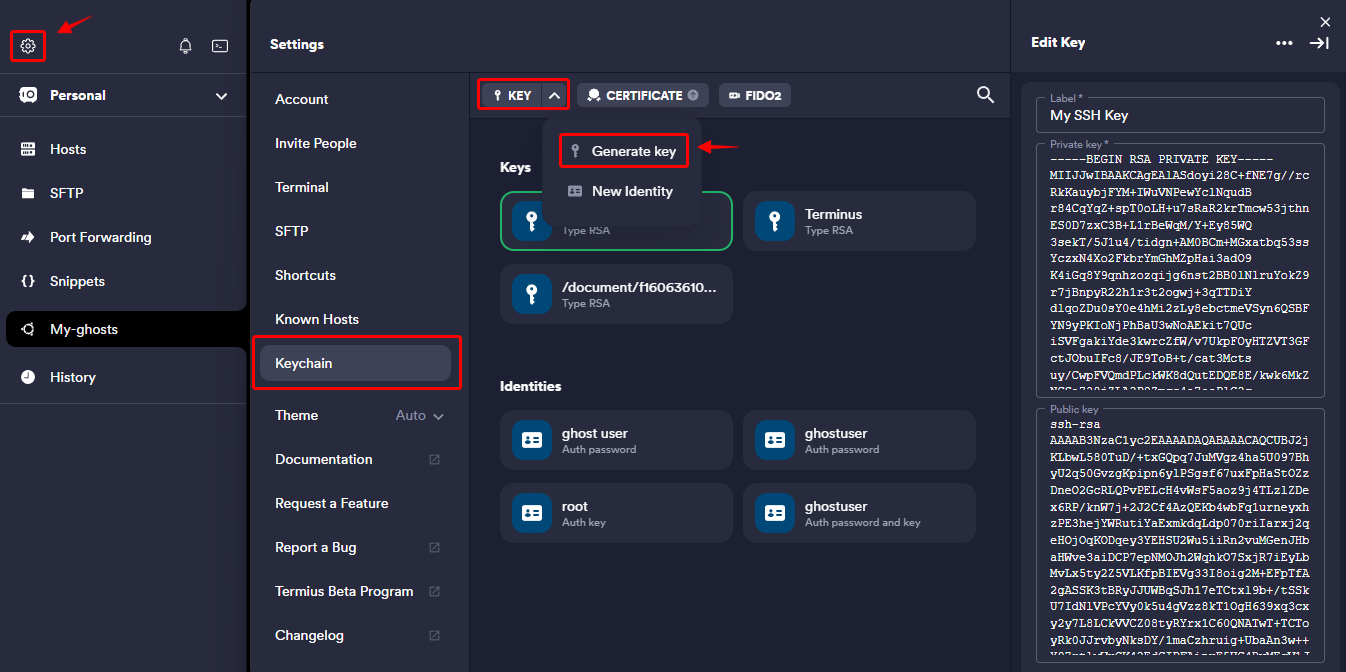
Make sure to copy and securely store both the Private Key and Public Key. These keys will be essential for secure access to your server.
ssh-rsa AAAAB3NzaC1yc2EAAAADAQABAAACAQCUBJ2jKLbwL580TuD/+txGQpq7JuMVgz4ha5U097BhyU2q50GvzgKpipxxxx...Note
Public Key will be used for create new server DigitalOcean, so keep it for next step.
2. One-click install ghost
Refer to the official Ghost documentation for a step-by-step guide on installing Ghost.
However, make sure to create a new server with a minimum of 2GB RAM as per the requirements (2 ghosts).
One-click install will auto install all server requirements for ghost.
Watch the video above as it guides you through the one-click installation of Ghost on DigitalOcean, providing easy-to-follow instructions.
Note
In Termius, you can use Ctrl + U to delete all text on the current line in the terminal. If there are incorrect texts during the process, this shortcut will help you clear the line quickly.
3. Install the second ghost
Refer to Aspire Themes tutorials for a step-by-step guide on installing sencond Ghost on DigitalOcean. Thanks Aspire Themes.
However, there are some differences.
Use Termius to access the DigitalOcean server.
You need the current MySQL host, username, and password.
Terminal window cd /var/www/ghost/cat config.production.jsonTake notes of them. You will use them later in steps 3 and 5.
Create a website directory
ghost-KoreaTerminal window cd /var/www/sudo mkdir ghost-Koreasudo chown ghost-mgr:ghost-mgr ghost-Korea/Login to MySQL and create a new database
Terminal window sudo mysql -u root -pCREATE DATABASE ghost-Korea;GRANT ALL PRIVILEGES ON ghost-Korea.* to 'ghost'@'localhost' IDENTIFIED BY '7d150600c49e7c5860be7ce03d4f8df67259176738d926ec';FLUSH PRIVILEGES;exitNote down:
MYSQL password:
7d150600c49e7c5860be7ce03d4f8df67259176738d926ecDatabase name
ghost-KoreaYou will need it for for step 5.
Switch to the
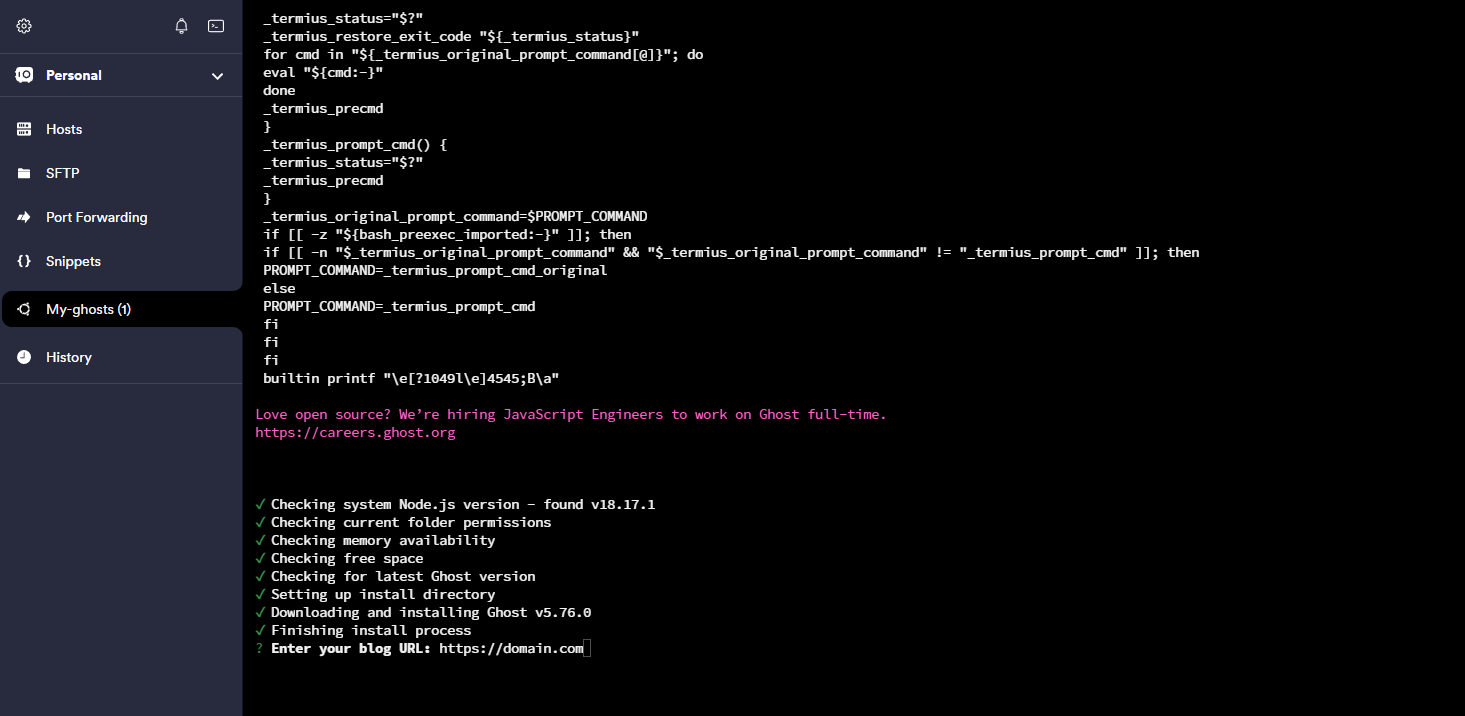
ghost-mgruserTerminal window sudo -i -u ghost-mgrInstall Ghost and follow the installation steps
Terminal window cd /var/www/ghost-Korea/ghost installAt
Blog URLquestion, you need to fillhttps://yourdomain.com/korCheck more ghost install with CLI
4. Config Nginx
Edit
domain.com-ssl.confTerminal window cd /etc/nginx/sites-availableslsnano domain.com-ssl.confNote
Replace your real domain
Add proxy block as below
domain.com-ssl.conf ...location / {proxy_set_header X-Forwarded-For $proxy_add_x_forwarded_for;proxy_set_header X-Forwarded-Proto $scheme;proxy_set_header X-Real-IP $remote_addr;proxy_set_header Host $http_host;proxy_pass http://127.0.0.1:2368;}location /kor/ {proxy_set_header X-Forwarded-For $proxy_add_x_forwarded_for;proxy_set_header X-Forwarded-Proto $scheme;proxy_set_header X-Real-IP $remote_addr;proxy_set_header Host $http_host;proxy_pass http://127.0.0.1:2369;}...Now you 2 ghosts and can access to ghost admin at:
English site (primary language) —
https://domain.com/ghost/Korean site (secondary language) —
https://domain.com/kor/ghost/
Check the Ghost Config documentation for instructions on setting up SMTP and other configurations for each Ghost instance.
Option 3: Hire Fiverr freelancer for help
Don’t let technical difficulties hold you back — tap into Fiverr’s network of skilled Ghost freelancers and get your Ghost project up and running in no time!
With a wide range of expertise, they can guide you through the intricacies of Ghost, ensuring a smooth and efficient deployment process.